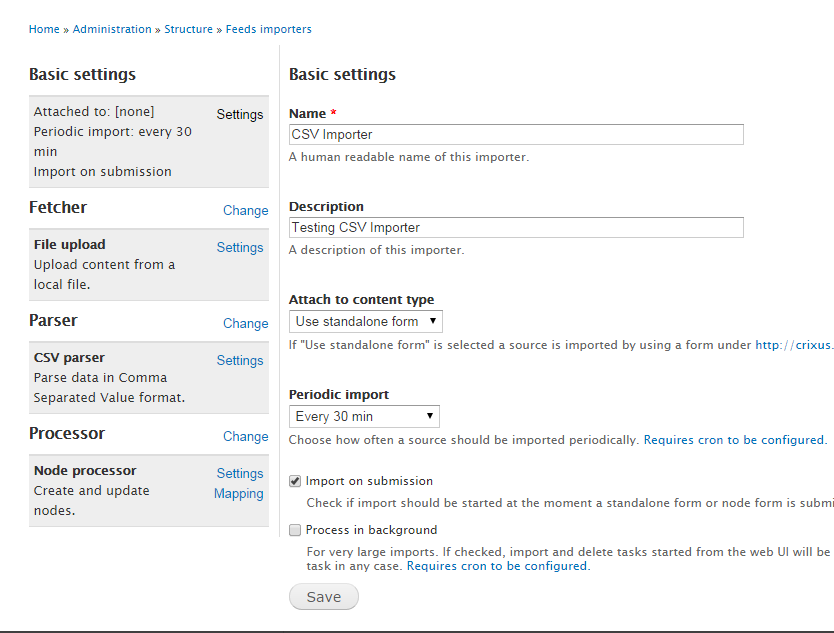
In order to do the mapping correctly, you have to instruct the feed importer how to do it. This is done through the configuration steps, shown in the following screenshots:
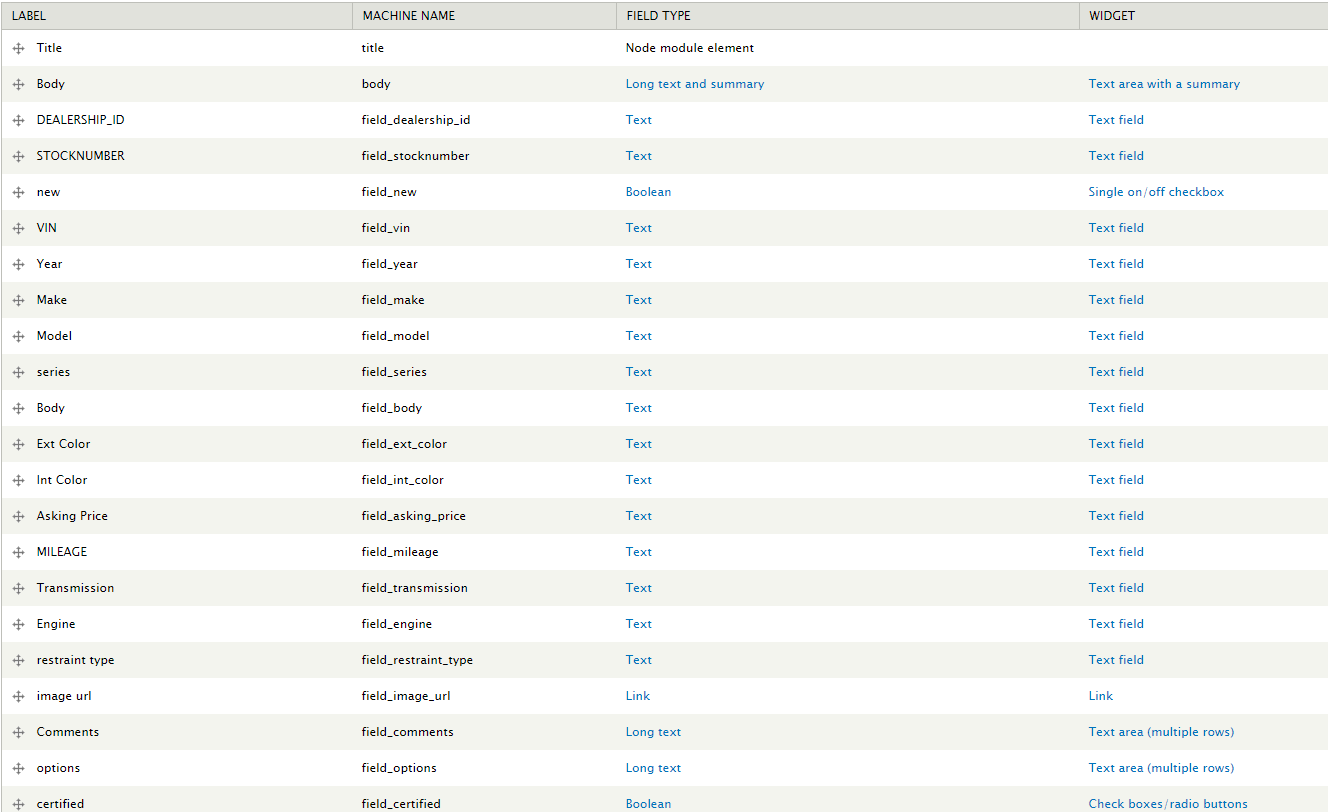
For sake of simplicity and time saving, I have created a content type called i.e. SimpleCar and added all the fields from the CSV file with the same name. Here is the screenshot of the content type:

Once you created a content type that closely correspond the screenshot shown above, then install/enable the following modules namely feed, feeds_ui,job_scheduler. And create a feed with the following configuration screens (closely watch how the feed is configured to read the CSV - Comma seperted file).

For simplicity, I have used the Standalone Form to directly upload the CSV. If you want this process to be triggered by CRON then you need to attach it to a content type - from the list).
You can also set the periodic import and tick the process in background option, you must have the CRON already configured.
Click on Fetcher and select either File Upload or HTTP, in this test case I have chosen File Upload, Save.
Once saved then you will see the File UPload Settings, Click it and see what is there. You can leave this settings intact. You can also tick the tick-mark to indicate where the feed importer should automatically pick up the CSV file and process it (should you have a way to automatically store the csv file in a directory then importer can pick it from there - that is advanced, you need to read about it).
Click on Parser and select CSV parser then SAVE. Once SAved then you will see the CSV Parser settings. By default it looks for Comma seperated, leave this intact and Save it. If you notice in this settings, there is a tick mark for Header, if you tick that then feed importer will start from top-most row, if you don't select it then first row will be skipped.
Click on Processor settings and choose Node Processor, Save. Once saved the Node Processor settings will appear and it has two sub-settings, Settings and Mapping.
The settings for this example, look as follow:

I have chosen Bundle as SimpleCar (which is the Drupal content type). This says that for every row of the CSV create one of the SimpleCar node. Save this screen.
The mapping settings of Node Processor should look as follow, to avoid mistakes, I recommend that you copy/paste fields directly from CSV and map them to their corresponding SimpleCar content type fields. Don't forget to map a unique value as VIN to GUID and Title and then Save.
Now go back to the basic settings and there is a link under the Standard Form drop down, you can use that link to upload your CSV and it should process and create your drupal nodes.
See my results:

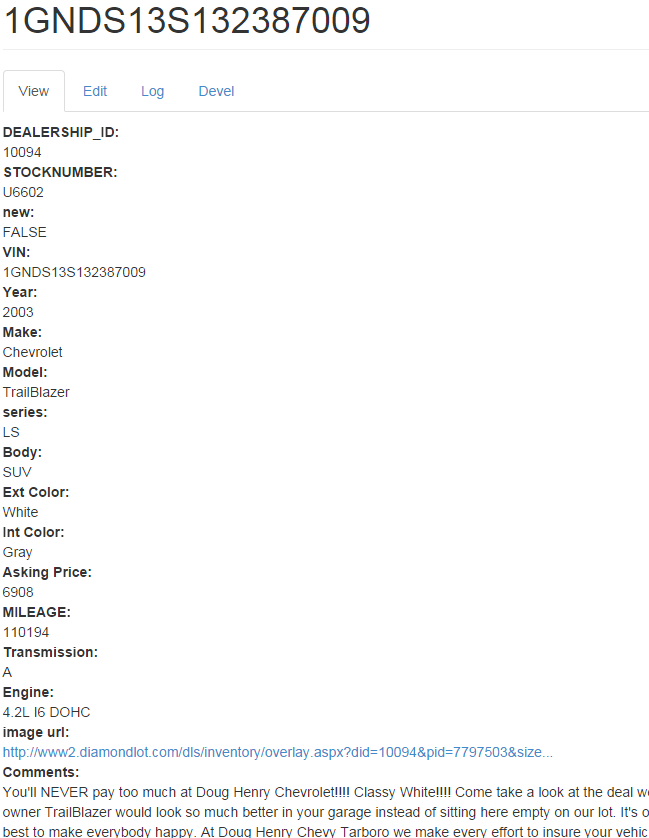
and here is how the node looks like

In case you are lazy to follow the instructions, then at least create the content type and import the following code to Feeds using Import feed functionality and give it ago. You can then customize this to do it for you automatically either via HTTP download from server or pick up the CSV file from a location. You of course need to do some reading, google, there are a thousand tutorials on feeds module.
$feeds_importer = new stdClass();
$feeds_importer->disabled = FALSE; /* Edit this to true to make a default feeds_importer disabled initially */
$feeds_importer->api_version = 1;
$feeds_importer->id = 'csv_importer';
$feeds_importer->config = array(
  'name' => 'CSV Importer',
  'description' => 'Testing CSV Importer',
  'fetcher' => array(
    'plugin_key' => 'FeedsFileFetcher',
    'config' => array(
      'allowed_extensions' => 'txt csv tsv xml opml',
      'direct' => FALSE,
      'directory' => 'public://feeds',
      'allowed_schemes' => array(
        0 => 'public',
      ),
    ),
  ),
  'parser' => array(
    'plugin_key' => 'FeedsCSVParser',
    'config' => array(
      'delimiter' => ',',
      'no_headers' => 0,
    ),
  ),
  'processor' => array(
    'plugin_key' => 'FeedsNodeProcessor',
    'config' => array(
      'expire' => '-1',
      'author' => 0,
      'authorize' => 1,
      'mappings' => array(
        0 => array(
          'source' => 'DEALERSHIP_ID',
          'target' => 'field_dealership_id',
          'unique' => FALSE,
        ),
        1 => array(
          'source' => 'STOCKNUMBER',
          'target' => 'field_stocknumber',
          'unique' => FALSE,
        ),
        2 => array(
          'source' => 'new',
          'target' => 'field_new',
          'unique' => FALSE,
        ),
        3 => array(
          'source' => 'VIN',
          'target' => 'field_vin',
          'unique' => FALSE,
        ),
        4 => array(
          'source' => 'Year',
          'target' => 'field_year',
          'unique' => FALSE,
        ),
        5 => array(
          'source' => 'Make',
          'target' => 'field_make',
          'unique' => FALSE,
        ),
        6 => array(
          'source' => 'Model',
          'target' => 'field_model',
          'unique' => FALSE,
        ),
        7 => array(
          'source' => 'series',
          'target' => 'field_series',
          'unique' => FALSE,
        ),
        8 => array(
          'source' => 'Body',
          'target' => 'field_body',
          'unique' => FALSE,
        ),
        9 => array(
          'source' => 'Ext Color',
          'target' => 'field_ext_color',
          'unique' => FALSE,
        ),
        10 => array(
          'source' => 'Int Color',
          'target' => 'field_int_color',
          'unique' => FALSE,
        ),
        11 => array(
          'source' => 'Asking Price',
          'target' => 'field_asking_price',
          'unique' => FALSE,
        ),
        12 => array(
          'source' => 'MILEAGE',
          'target' => 'field_mileage',
          'unique' => FALSE,
        ),
        13 => array(
          'source' => 'Transmission',
          'target' => 'field_transmission',
          'unique' => FALSE,
        ),
        14 => array(
          'source' => 'Engine',
          'target' => 'field_engine',
          'unique' => FALSE,
        ),
        15 => array(
          'source' => 'restraint type',
          'target' => 'field_restraint_type',
          'unique' => FALSE,
        ),
        16 => array(
          'source' => 'image url',
          'target' => 'field_image_url:url',
          'unique' => FALSE,
        ),
        17 => array(
          'source' => 'Comments',
          'target' => 'field_comments',
          'unique' => FALSE,
        ),
        18 => array(
          'source' => 'options',
          'target' => 'field_options',
          'unique' => FALSE,
        ),
        19 => array(
          'source' => 'certified',
          'target' => 'field_certified',
          'unique' => FALSE,
        ),
        20 => array(
          'source' => 'VIN',
          'target' => 'guid',
          'unique' => 1,
        ),
        21 => array(
          'source' => 'VIN',
          'target' => 'title',
          'unique' => FALSE,
        ),
      ),
      'update_existing' => '2',
      'input_format' => 'plain_text',
      'skip_hash_check' => 0,
      'bundle' => 'samplecar',
    ),
  ),
  'content_type' => '',
  'update' => 0,
  'import_period' => 1800,
  'expire_period' => 3600,
  'import_on_create' => TRUE,
  'process_in_background' => FALSE,
);


